
In the woodworking activity , if you want to be successful and create correct and beautiful woodworking projects , you should kmow of the measuring and marking tools you should propably have . No matter if carpentry is your hobby or your profession .
No matter if you’re an amateur or a master carpenter .
The woodworking measuring tools are the tools that provide you the ability , to measure and transfer to other spots , distances and lengths of all types ( straight lines , curves , circles , arcs ) , correctly , accurately being “surgical” precise , before you start marking your wood .
The woodworking marking tools are the tools , that let you create totally accurate , correct as initially planned and visible marks on your wooden surface , before you start making actions ( cuttings , drillings , joinery , shaping et.c ) on it .
What are the 3 basic Types of measuring tools ?
The 3 basic types of woodworking measuring tools with which you can measure the majority of lengths , are the folding / tape type meters for measure straight lines , the divider / compasses for curves and arcs , circles and the squares for measuring and checking 90o and 45o degrees .
Having the above ones , you can do most of the woodworking actions you want to create a wide range of carpentry projects .
You can measure : straight lines , curved lines – circles – arcs , distances between 2 spots , tranfer distances of all kinds and check for squareness in order your wood plans , be design wise correctly .
Why the woodworking Measuring & Marking tools are so important in carpentry ?

The woodworking measuring and marking tools together with the accurate visualization of our carpentry project in the 3 dimensions ( 3 -D ) , are the most important issues in the woodworking , with the measuring and marking tools being more important .
In my personal opinion , of course . Why ?
If we don’t measure “surgically” and 100% correct according to our initial wood design , all the next woodworking actions – steps we’ll make , they’ll be incorrect , awry and wrong , leading us to a complete failure .
The correct , precise and very “strict” measuring is the column of our woodworking plan , after the correct supply of the appropriate wood we need for the specific creation we want to do .

If we measure incorrect , we’ll mark incorrect and after that all our next moves with our hand or power wood machinery will be incorrect – wrong – inaccurate . It’s like the base , the foundation of a house .
If the foundation is awry and incorrect , all the above floors will be awry , incorrect and maybe with disastrous affect to the entire construction – house .

No matter how nice and correct we have visualized our wood plan , no matter how good is our cuttings , our drills , our sanding , our carvings , our expensive woodworking machinery , et.c , if the measuring is wrong , our project will be a disaster , at the “end of the road” .
Imagine a mortise and tenon joint , if we’ve measure and mark incorrect with our gauges and our joint isn’t tight but badly loose . The joint will be a total failure .
So the supply of the best possible measuring and marking tools , as the correct use of them , is a necessity for a woodworker .
What is the complete List of the Woodwokring meauring & Marking tools , i should have ?
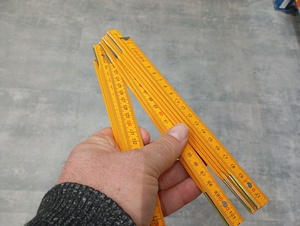
1) The Folding Ruler .
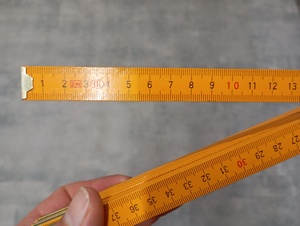
This is maybe the cheapest tool you may have or buy . Its a traditional woodworking tool and you can measure straight lines ( not very long ones ) with very nice accuracy . Its material is wood and always check the metric number on it , to fit in your demands .
Remember not all condinents use the same metric system . Some use , meters/cm , other use inches , and whatever else . If you choose to buy a vintage one , check the number on it , to be clear and visible .
See my best ruler suggestions for you to get from the markets , in HERE .
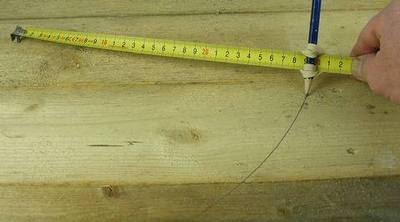
2) The Tape meter .
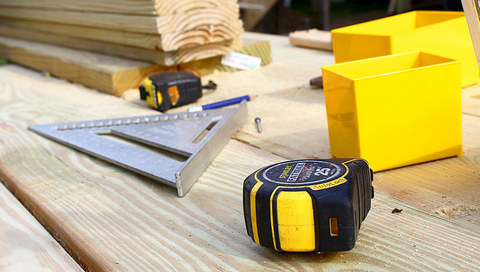
It’s a very comfortable version of a meter . It’s very portable ( you can have in your pockets ) and it can measure very accurate small lengths , long lengths( wood boards ) and have also a very big advantage .
It can measure circles , arcs and in general curves very accurate , if you are precise and careful enough .
3) Metal Rules .
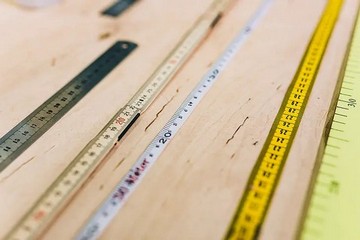
When you don’t want to “carry” with you the folding meter and the tape meter doesn’t give comfort yo measure small basically distances , the metal rules are covering this gap , in here .
They’re small pieces of metal with the metric numbers on them and you can use them very efficiently when you measure more “delicate” and small lengths above your woodworking bench .
4) Digital metric meters .
When you want to measure very long distances/lengths , maybe an entire log , a very long wooden board and you want also very big accuracy , there are digital metric rules in the markets you can use .
They use lazer to count the distances and they give very accurate results .
In big constructions ( log houses , wooden platforms , bridges , et.c ) , these metric systems are very useful .
5) Digital calipers .
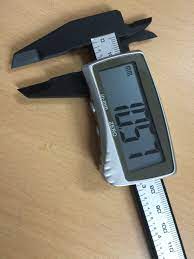
You use these tools to measure the thickness of a wood piece . You can find traditional/vintage ones , but if you want “surgical” metric accuracy( in joinery , et.c ) , prefer the digital ones .
My best caliper suggestions for you to supply , in HERE .
6) Dividers – Compasses .
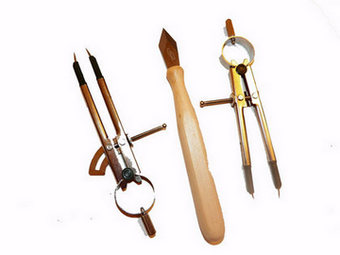
The dividers are very basic measuring tools . You can measure extremely accurate distanses with them from the point A to point B , no matter what interferes between these two spots . A small object – obstacle , a wood gap , a wood bump , et.c .
You can measure straight lines , straight lines that end to curve lines , curves , arcs , circles , diameter of circles , circle radii and whatever mixture you can imagine .
See my best divider suggestions for youto buy , in HERE .
If you have 2 spots , you can measure their distance , no matter what there is between them .
Another colossal qualification of the dividers is that you can transfer curves and wood patterns from one area to another ones with 100% precision . A log curved wood pattern , can be transfered to another surface with easiness .
7) Trammel Points .
When our divider is small and we want to measure curves , arcs in large and very large wood pieces , we choose to use the trammel points .
My favorite protractors , trammel points , et.c suggestions for you to purchase , is HERE .
8) Marking pencils – Lead holders .
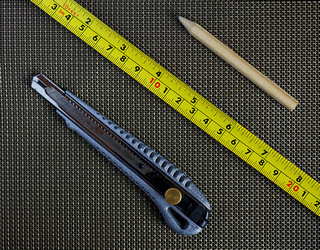
After your correct measuring you’ll need of course something to mark on your wood . Try to have the best possible pencil you can have and as many of them , because pencils are small , easy to get lost , et.c .
The lead holders , together with the classic carpenter’s pencil , will be just fine for all your needs .
Precision and accuracy is the “name of the game” in here and some nice quality’s , lead holders and pencils are a must .
I’ve chosen some of the most classical pencils – lead holder to purchase , see more in HERE .
9) Marking Knives .
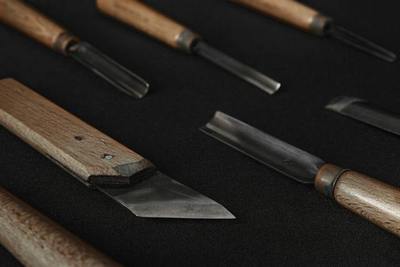
For your wood joinery( and not only ) , you’ll need some marking knives . They mark highly accurate , something you’ll need for your joints .
My top striking – marking knives suggestions for you to buy , in HERE .
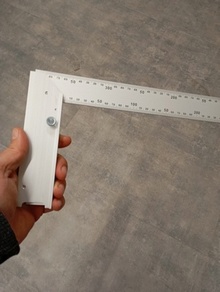
10) Squares .
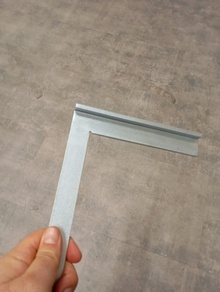
The squares allow you to check the face and the edges of your boards , concerning the 90o wood squareness “law” . They’re very important carpentry tools . Of course except the 90o checking , you can mark your wood( in 90o ) using the squares and then proceed to your cuttings , et.c .
Check your verticality with my top square suggestions to buy and more , for you in HERE .
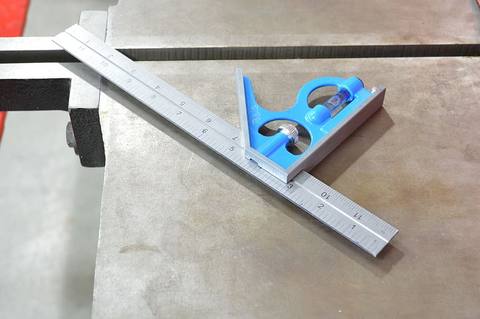
11) Combination Squares .
Using these squares , you can not only check for 90o squareness but for the 45o degrees also .
12) Double Squares .
They have a T shape and you can check the depth of your joinery , easily .
13) Try Squares .
They are vintage type ones .
14) Framing Squares .
They are big squares , letting you check big boards and big wood pieces for squareness , when the other ones cannot do .
15) T – Bevel Squares .
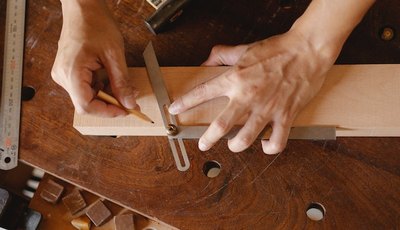
These are sliding squares and you can “hold” and transfer angles easily ( making dovetails ) and not only .
16) Marking Gauges .
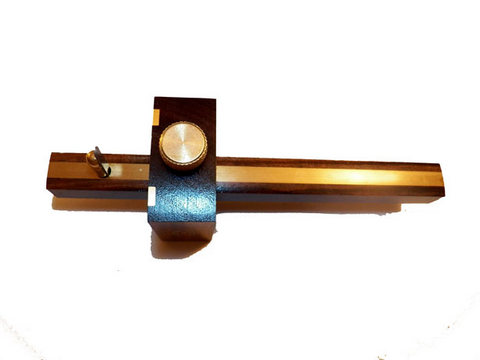
We use the marking gauges , to mark very accurate reference lines from our wood board edge and other pieces using sharp pins . The gauges uses the edge as a stable refering and guiding spot , in order to mark inside the wood surface , across and totally parallel in all of its length .

They’re of course adjustable and we can mark lines in our wood board or whatever , as we want .
I’ve picked some of the best scribing gauges for you to buy from stores , in HERE .
17) Mortise Gauges .
These gauges are used to make – mark the “shoulder” of our mortise joint . They have two pins – whells – cutters , adjusted to where we want .
18) Wheel Marking Gauges .
These ones , they use a sharp wheel( not a pin ) to mark the reference lines , we like in the wooden board .
19) Panel Gauges .
These gauges are the largest gauge we can have and they used to mark – cut lines in big boards and usually when we want to rip a wooden board , in a length we like .
20) Cutter Gauges .
When we have a very tough – hard type of wood and the “clasical” pin in our gauge cannot mark easily , we use these cutter gauges . They have cutters – slicers in order to mark the hard surface of a hard type of wood , or maybe across the wood’s fibers , which is a tougher “job”.
Remember in HERE , the basic 3 types of wood .
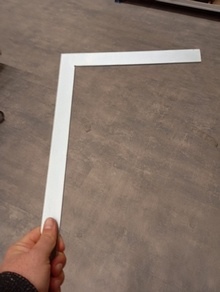
21) The Straightedge tool .
You don’t need to buy this and you can make it yourself . You use this to check the edge & face flatness of your wooden boards after you’ve square them .
22) The Protractor .
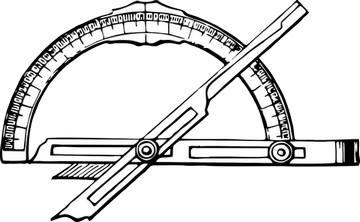
The protactor is use dot check your angles after your sharpening .
I’ve chosen some very good protractor choices to buy , make a check in HERE .
23) Twisting Winding Sticks .
These have the same “laws” and approach as the straightedge . You use the twisting sticks to check if your board , surface is twisted by putting 2 of them in the edge of your board and passing them , in all its length .
If you see somewhere ups or downs , you can use your hand planes to fix them .
I’ve picked some of the best straightedge & winding sticks to buy from Amazon , in HERE .
24) Fealer Gauges .
These are as the clasical fealers you know . They are metalic pieces – “leaves” and by passing them between your twisting stick and the wooden surface , you see the flatness and the gaps .
Get some feeler gauges for your thickness checks from the stores , in HERE .
25) Dovetail Makers .
I know that you can make dovetail with many ways , but one way to make dovetails with accuracy and easiness , is by using the dovetail makers .
What is the most Often Measuring tool in woodworking ?

The most often measuring tool in woodworking is the folding rule and the tape meter and these two are often used and carried together from the carpenters , because they are portable and can handle “heavy duty” missions in all weather , or other conditions .
Of course the carpenter’s pencil is never missing from any woodworker’s toolbox and pocket .
Keep woodworking and gain happiness from it .