The first woodworking project , is always a viral and serious situation among the amateur carpenters moslty .
Your first woodworking project should be something , very simple , very strong to last for ever , not a complex designed one , not too heavy (in order to have it with you daily) , made from “ordinary” not expensive wood , have the basic joints , be well protected and for sure a very emotional one .
My first emotional – basic first woodworking plan was a wooden stick as you see in the below video , but you can make many more using only hand tools , some nails and screws , a level tool , some sandpapers and nothing more .
What is the first Step , in a woodworking project ?
The first step in every woodworking project you want to accomplish is the correct choice of the appropriate wood type you should use for the spefific project you have and then is the correct cutting of it , after your accurate measuring and marking .
What is a Simple woodworking project ?
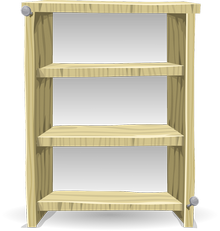
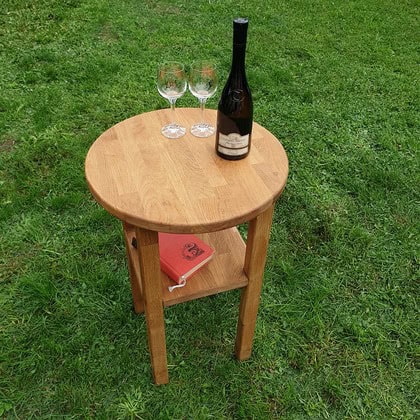
A simple wood project is the one that uses simple joints( pins & screws ) , it hasn’t a complex design and these types are the shelves , the key holders , simple tables with pins and screws for their joints , the kitchen cutting boards , simple chairs and of course some walking wooden sticks .

What are the 5 Steps , in planning your woodworking project ?

First you should visualize the project in your mind and deside the wood type you’ll need , then you should supply this wood type , next you should get the appropriaate wood tols you’ll need , then your measuring and marking is super crusial and finally you should start your cuttings precisely .
How do you tell , How much wood you need for projects ?

You should measure the longest lengths for all the wooden surfaces you’ll need for the woodworking project and then multiply this number you’ll get by 2 , so you can have plenty of wood to fulfill your plan but not get too much wood spending more money .
So lets’ see some of DIY very basic , simple and nice woodworking projects you can create with no much effort and money requirements :
1) A Wooden Tripod for your Cameras – Smartphones .
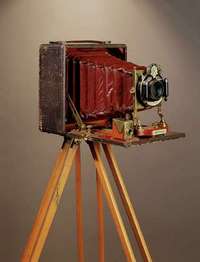
You’ll need in here 3 wooden pieces – “legs” and only a couple of screws . The legs should have exactly the same length , of course .
Join together with the screw the two legs and then the other one , created a wooden pyramid – triangle and above this pyramid , adapt your camera’s base . That’s it .
You’ll need only a hand saw to cut the legths for your wooden legs and a screwdriver to scew the screws , making the pyramid . If you don’t screw too stiff the screw , you can open and close easily the 3 legs , adapting your tripod in the height you want .
Materials , you’ll need :
Three wooden sticks – legs , some screws , a screwdriver , a meter , a hand saw .
2) A Pet House .
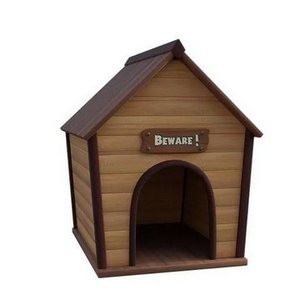
Another very easy project in here . Join together with nails and screws three wooden boards , to be the walls and the roof for your pet’s home , created a nice ( Π ) frame and your dog , cat , et.c is ready to get inside from the opening .
If you want to create a more good looking roof , cut the edges of two wooden boards in 45o degrees , join them together with pins and your roof is ready . Use your miter box to cut the 45o degrees .
Some very nice miter boxes suggestions from the markets to in angles correctly , are in HERE .
Materials , you’ll need :
Three wooden boards to be the “skeleton” – walls of your pet house and two more if you want a traditional roof , some nails and screws , a hammer , a meter , a screwdriver and a hand saw .
3) A Painting Tripod .
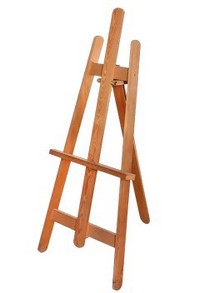
In here the approach is the same as the cameras tripod , except you’ll need a couple more of wooden horizontal cubits , in order to place your painting canvas above them .
After the creation of your wood pyramid with the three cubits , nail two cubits horizontally on the two front legs to place your canvas and you’re ready .
Be carefull to the distance these two horizontal cubits should have . They should be shorter than the canvas width , in order to support properly .
Materials you’ll need :
A couple of wooden cubits ( 5 -6 ) , some screws and nails , a hammer , a screwdriver , a meter and a level tool . The level tool will help to nail the horizontal cubits , horizontal correctly and straight .
4) A wooden Wardrobe Screen , for changing clothes .
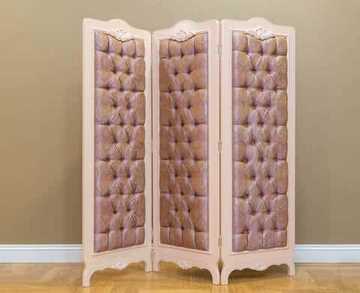
This is maybe the most easy of the carpentry projects you can create , but it can be a very beautiful one , if you choose a very good looking wood .
You can join together two very beatiful wooden boards , in the height you want and create a very nice wood curtain in order to change clothes and not be seen .
A 6” height is just fine , for all the human heights . If you want to cover your whole body and you’re Giannis Antetokounmpo (!) , ok make it a couple of inches taller .
This can be for the outdoor use or for indoor . Join together these two wood pieces using hinges and screws . The distance between the hinges , should be around to 20cm , in order this curtain be stable enough .
Materials , you’ll need :
Two wooden boards , some hinges , screws a screwdriver , a meter and a hand saw . If you’ll use this wooden curtain for outdoors , you’ll need to take care of it more effectively .
The weather conditions and moisture , can damage wood .
If you’ll use this wooden curtain in the outdoors , you’ll need a nice and strong protection from the weather conditions .
I’ve picked some of the best dyes – paints – varnish and more for you to buy , in HERE .
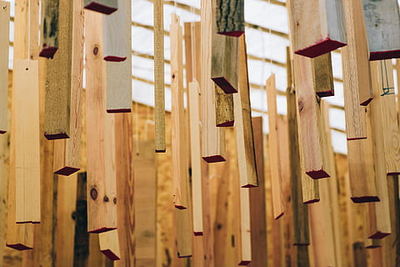
5) Create Wooden Dowel Joints .
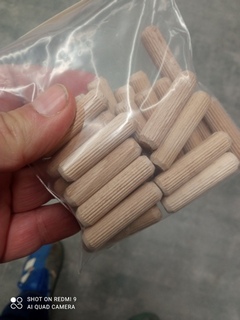
The creation of some dowel joints from you to use them for your wood connections , is something , very easy . The only thing you should do , is to find as much straight wooden cubits – sticks as you can from tree branches and elsewhere .
Cut them in the lengths and the thicknesses you want , rub them with your sandpapers to smoothen them and your dowels , are ready for use .
I personally when i finish smoothening them , i immerse them totally , into a mixture of linseed oil and bees wax ( the wax in 8% – 10% ratio with the oil ) , in order to make them very strongly protected and “bulletproof” .
If you want to use your dowels in outdoors , use teak oil and bees wax and your dowels will be UV protected , along with the general protection the oils and waxes do .
If you want to supply some of the best oils & waxes for natural protection , go in HERE .
Materials , you’ll need :
Wooden cubits – sticks , a japanese style hand saw , a meter , some sandpapers .
6) Create a Basic Woodworking Toolbox .

If you simple nail five wooden boards , making an open wooden box with an above opening to place your tools inside , you’ll have a nice and basic carpentry toolbox .
Attach maybe a nice leather handle – belt , in order to carry your toolbox , and you’re ready . Of course inside the box you can place some partitions , to organize better your tools and don’t hit each other and “mission accomplished” .
Materials , you’ll need :
Five wooden boards( 4 for the sides , – one for the bottom ) , a hand saw , some nails and screws , a hammer and a screwdriver , a meter .
7) Create a wooden Fence , of any length .
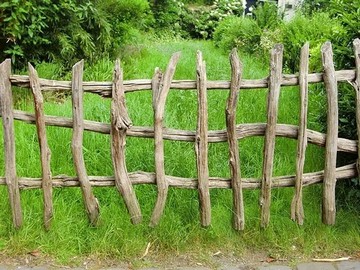
In here again , you don’t need much carpentry experience or “difficult” woodworking tools .
You can create a very nice and strong wooden fence using wooden boards , place them one next to the other digging a little in the soil maybe , or not and by using some nails and screws .
You can do the above using logs or entire tree trunks , or whatever wood piece you can find easily . You’ll need only a saw for your cuttings and for sure a level tool . You don’t want your horizontal fence pieces , to be placed awry .
Materials , you’ll need :
Wooden boards – logs – trunks , a hand saw , screws , nails , a hammer and a screwdriver , a meter , a level tool and maybe some metalic wire or a rope to use .
8) Create a Kitchen’s Rolling Pin .
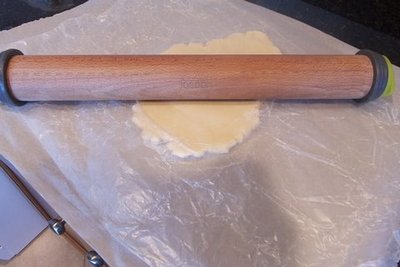
The rolling pin , is something every kitchen in the world has and to make one from your favorite wood piece , is a “piece of cake” and very easy .
Pick your favorite wood type , choose the length you want , cut it with your hand saw and then spend the most of your time to smoothen it , with your sandpapers .
Your rolling pin , should be as smooth as possible .
Some top sandpapers brands and more abrasive suggestions to help you in smoothing , in HERE .
Materials , you’ll need :
A wooden round stick – branch , a hand saw , a meter , many sandpapers .
Safety Tip :
Never use chemicals of any kind to finish – protect your kitchen’s equipment .
9) A wooden Trash Brush .
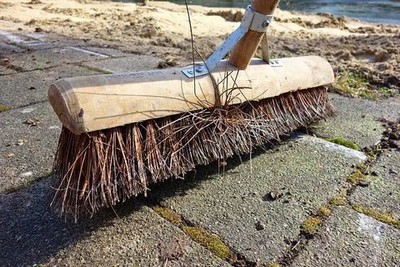
If you have a nice wooden stick or a cubit , cut it in the height you want depending on your body’s height and adjust it in the brush’s hole , you can create a very nice brush for your backyard , or more .
Your only concern , is to find a straight enough stick – cubit and using your sandpapers , you can smoothen it very nicely for your hands .
For the edge of the stick you’re going to adapt to the brush’s hole , you may need to rub it a little more in order to fit , but it isn’t a big deal .
If you like more securance and stability to your brush , you can use a couple of screws for the joint .
Materials , you’ll need :
A wooden stick – cubit , some sandpapers , a hand saw , wood glue and maybe some screws .
Anybody can do the above woodworking projects – crafts , evef if he/she is very new in the woodworking activity . You only need some nails , screws , some hammers and hand saws , et.c , tools every warehouse and garage has .
You should not always try to create something very extreme or hard , but something that can use in your daily routine – life and enjoy it for many – many years .
Woodworking isn’t only creating astonishing wood plans . It’s about emotions and deep feelings .
Keep Woodworking and your happiness is certain .