
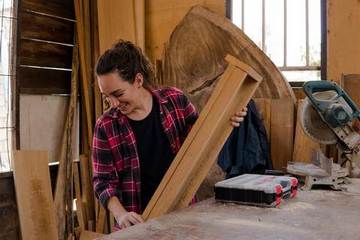
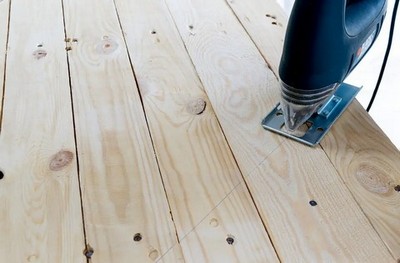
No matter if you’re an amateur woodworker or not , you’ll need to act with wood in order to shape it and create your carpentry projects , eventually . You’ll need to cut it , drill it , carve it , join it , rub it , paint , finish it and in general make actions with the wood’s mass .
Of course you cannot do ( with safety and efficiency ) in the air , on your legs , or lying(!) on the floor . You’ll need a place to do all the above .
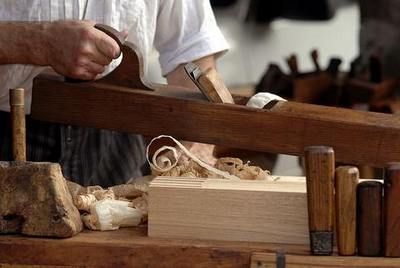
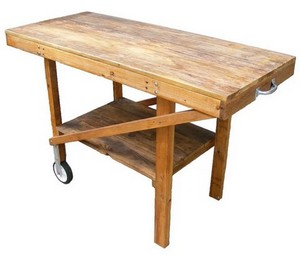
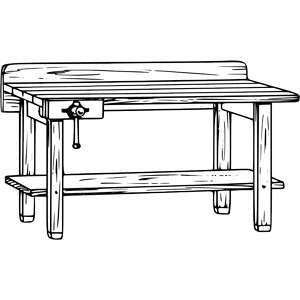
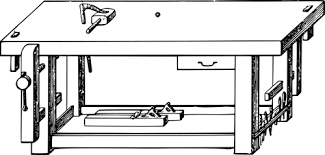
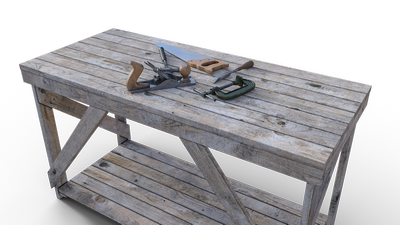
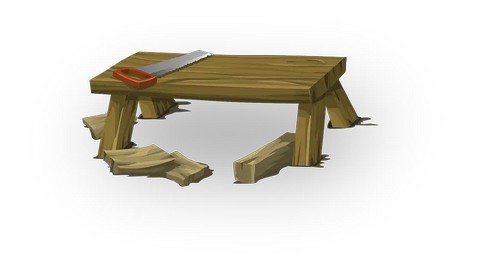
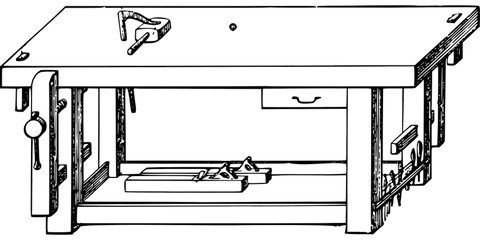
The woodworking bench is a wooden(mostly) table with four legs and a totally flat and straight wooden surface , on which we attach auxiliary equipment and tools( vices , et.c) , so we can be more safe and comfortable and while the carpenters work with wood , in order to make their woodworking actions and create their plans .
Why do you need a woodworking bench ?

You cannot act carpentry and make the actions that you need , if you don’t have a place in which you’ll be comfortable .
Except the comfort factor , acting woodworking on a well made bench , will give you safety , efficiency , high wood interacting accuracy and way less physical and mental effort .
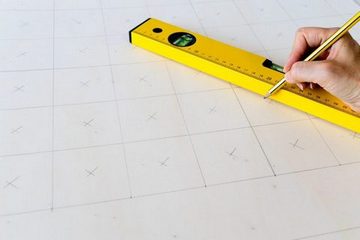
Acting woodworking means , measuring , marking , cutting , drilling , sanding , and so many other wood “jobs” and all these need to be done with the maximum focus from you , if you want a fine result .
The benefits of a bench are many and imagine having to work your wood plan , on an inappropriate bench for many hours .
The physical fatigue , will cause mental fatigue and this may cause you serious problems and for sure serious safety problems . The woodworking tools are sharp and if your mental seriousness isn’t in the highest level , you may get hurt .

So a well made wood bench is a “must” for all the carpenters and in my opinion , it’s a basic “column” of woodworking .
What are the types of the Woodworking Benches and do i need more than one ?
The types of the benches are three and they are :
1) The Carpenter’s bench .

2) The Cabinet maker’s , bench .
3) The Portable bench .
The above benches aren’t something “extreme” , you should feel “awe” . They have just differences in their properties( sizes , attached tools , storage places ) , in order to make the carpenter’s life easier , for the job he wants to do .
Of course you don’t need to have them all and a “simple” , but a well made for you bench , would be just fine for you . The transportable bench usually has small wheels on its 2 legs , in order to move easier and it’s smaller than the other two benches .
What makes a Good Woodworking Bench ?
A good woodworking bench should be in the appropriate size to fit exactly to the carpenter’s size . It should have the appropriate tools( vices , et.c ) the carpenter wants , attached to it and it should be manufactured in a way to help the carpenter’s work with easiness and safety , on it .
A good bench should be created with safe materials ( non allergic , impregnated wood with toxic elements , et.c ) and in a “friendly” way to the user . No sharp edges , no metalic parts “popping up” from several areas that can damage the user , are “allowed” .
A good woodworking bench should be architecture manufactured focused , to fit in your body size and characteristic and should make the carpenter’s life easier , safer , comfortable and relaxed to work with , many hours .
See my top Workbench & accessories suggestions for you to buy , in HERE .
What should a Workbench have extra , in order to be a precious carpenter’s helper ?

A wood bench has four legs , an above wooden(mostly) surface and several kinds of carpentry tools(vices) attached around and above it . It may and should have except the above working surface , more surfaces below with shelves and boxes , used as storage places .
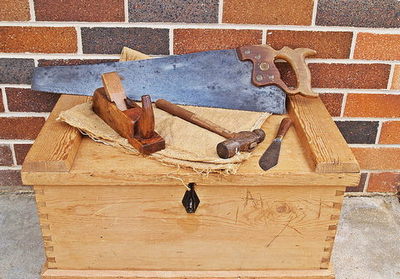
A carpentry bench if it is big enough , it may have below the carpenter’s toolbox and many “hidden” shelves and drawers to keep power tools , hand tools and some auxiliary ones .
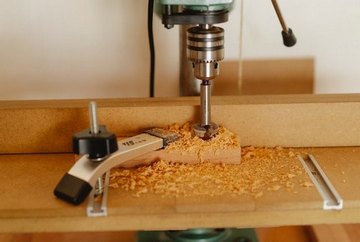
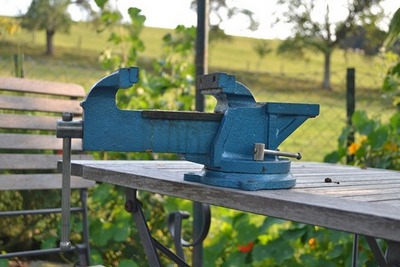
What is the workbench tools and Why do i need them ?
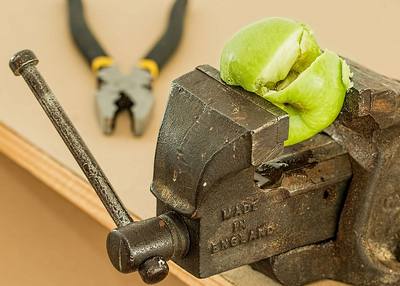
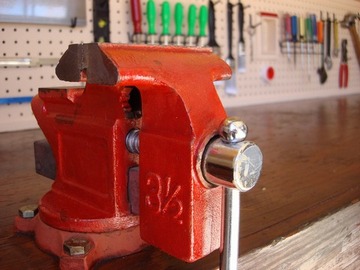
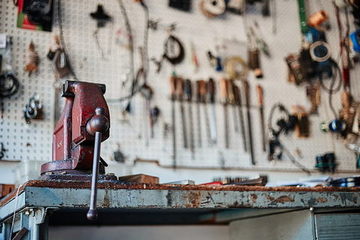
The workbench tools aren’t the several hand and power tools the carpenters have , but there are the tools that they’re attached to the bench’s mass( surfaces , legs ) and they’re used as the bench’s “extensions” and “complements” .
These tools are mostly several kinds of vices . Wooden and metalic ones .
Of course we use many small wood pieces – slats – stabilizers ( like the dowel joints ) , which we place them inside the surface’s holes( british style benches ) , to stabilize more , several lengths of wood .
We use these tools – vices – small wood pieces , in order to stabilize our wooden pieces( boards , logs ,et.c) , above the bench’s surface and make our several wood actions .
Carpentry needs accuracy in our measuring , cutting , drilling , et.c and you cannot be accurate if your wooden piece isn’t totally stable .
The vices and the wooden slats are used as stabilizers .
How Many vices , a woodworking bench have ?
A bench has vices attached to it and other external ones we put as more helpers . The vices , a wood bench have are :
1) The Bench Vice .
It’s the main vice attached to the bench .
2) The Leg Vice .
It’s supported to a bench’s leg and we stabilize wood by screwing .
3) The Shoulder Vice .
You’ll find it mostly in the European style of benches and we use it for making dovetails .
4) The Tail Vice .
It’s a clamp vertical vice .
5) The Wagon Vice .
It “pops” from below ot the bench’s surface and stabilizes wood .
6) The End Vice .
It ‘s attached to the end of the bench and it has the same width as the surface . It’s like an extension surface , at the end of the bench in which we screw a bolt to control the opening .
7) Auxiliary Vices .
Many types of vices , used as stabilizer clamps .
8) Metalic Vices .

They are attached mostly at the bench’s sides and they can be iron , steel , cast iron( antique style ) .
** See my top metalic Vice suggestions for you on Amazon in HERE .
You can find British style ( many holes on the surface ) , Frensh Style ( the Roubo style ) and several kind of European style benches .
Where a vice should be placed on a bench , to work more Safe & Easy ?
We stabilize our wood with vices , in order to make actions on it . These actions ( rubbing , cutting , actions with our planes ) , are “moving forward actions” .
According to what hand is your “good hand” , place the vice in the appropriate bench corner .
How Thick should a woodworking bench top be , for better performance ?
In here i know that there are many “cliches” concerning the “ideal” thickness of the carpentr’s bench . Some say 3” , some more than 2” is enough , some like their bench surface to be the thickest as possible and they choose 5” , et.c .
I personally like my bench to be thicker than the 3” because i want the higher possible stability when i act woodworking and the sense that my bench can manage any difficult “job” .
Of course the material of the surface is vevry crucial to its thickness . If you choose a “soft” type of wood , you may need more thickness .
I have a post for the types of wood , if you want to remember some , read it in HERE .
What is the best Width for a carpentry workbench ?
In here the same applies as in the thickness of the benches . Most of the workbenches have widths at around the 2 meters( 5ft – 8ft ) , but in my opinion this depends a lot from a very crucial factor .
This factor is , totally attached to your size . You , are the one who is going to work above your bench and not anyone else , that’s why you should choose according to your size . Your height , your weight , your arms “opening” , the length of your upper body .

You know there are people who their upper body is longer than “usual” and their total height . Many basketball players are like that . I suppose you cannot persuade – “force” the NBA Star , Giannis Adetokunbo (2.13cm height) , to work in a bench made for 1.75cm man .
What is the best Length for a woodworking bench ?

Of course in here the same applies as for the width size . It depends of your personall size , but in here we have another significant parameter .
If your woodworking activity is mostly focused on a specific type of carptentry , which requires longer or shorter than usual bench , you should choose depending the wood “job” you’re acting mostly .
If you carve small wooden toys only , you don’t need a 24” or longer bench .
You can cut your wood pieces using your power or hand tools , in the smaller sizes you want and work in a smaller type of bench .
Mostly in here the length of the benches are between the 20” – 25” .
How Tall should my workbench , should be ?
In this bench dimension , the same “law” exists as it existed in the previous ones . It depends of your physical size , but i have to suggest you something that comes from the “old” carpenters and i’ve checked it , by asking some engineer friends .
When you’ll be working to your bench , you’ll bent your back and you’ll make several body moves and create angles with your body . This is engineering .
So i suggest you , if you want to put the fewer possible stress to your back , your bench’s height to be around( and maybe a little higher ) your belly button’s height .
Should I Color my workbench’s surface ?

Most of the times if you buy a workbench it has from its manufacturer , wood protection with preservatives and other ways , in all of its mass . This protection is made with natural or chemical materials , depending the bench creator .
I’ve picked some top oils – waxes & shellac suggestions for natural finishing , see them in HERE .
Concerning the coloring of your bench’s surface , i wouldn’t suggest you to do this .

Above your bench’s surface you’ll make measuring – marking – cutting for your wood plans and these actions should be the best possible and accurate .
A coloring surface( especially under a lamp’s light) will tire and “confuse” your eyes and make these carpentry actions , way more difficult not mentioning the danger parameter , caused from this “eye confusion” .
What should i watch out , for best workbench Choice ?

1) A woodworking bench should be made , from non dangerous – toxic – allergic elements .

2) It should be have 4 strong and with equal length legs .

3) It should have above these 4 legs , a strong – solid – thick enough wooden surface . I suggest this surface to be a wooden one . Of course it may have , more “helper” below surfaces , shelves , drawers .
The engineered wood ( MDF , Particle boards , et.c ) , it may be strong and hard(MDF) , but it’s slippery and has big pores – gaps ( particle boards, et.c ) . This will make your wood to “hang ” , or slip more than you want . A slippery surface is a dangerous one , to use your sharp tools above .
4) These 4 legs should be , very well attached – joined ot the surface and they should not overlap , the surface level . The surface in which you’ll be working , should have zero protrusions .
5) The general stability of the bench , must be colossal . Don’t hesitate to sit on it , try to move it , twist it , push it and whatever else to check its stability . The 4 legs , should be well joined ot the surface and ot its other .
6) The wood of construction , should be 100% solid , giving you the sense of the “heavy duty ” .
7) The woodworking machinery on it( wooden or metalic ) , should be very well attached( no trembling ) to it .
8) The tools machinery(vices) , should work , perfectly in all ways , in all range .
9) The workbench should be heavy . Usually they are from 600lb – 1000lb .
10) A well made woodworking bench isn’t cheap , or looks cheap . It gives the sense of highly prestige .

Last Workbench “Secrets” and Tips .
1) Prefer to use natural finishing and protecting materials , as bench preservatives . Linseed and a nice bees wax , would be just fine . Don’t forget to rub the excess of wax when you’ll make your final protection layer .

Of course the paint and other more chemical finishings aren’t bad , especially if your workbench will spend some time outdoors .
I’ve picked some classical dyes – lacquers – paint products for finishing , in HERE .
2) Don’t have nails and screws , to “hug” things in the sides of your bench . You’ll tear your clothes , while acting carpentry and you may scratch your skin , too .

3) If you have more wooden surfaces below the main one , try to have them from the height of your knees and above . Many times you’ll need to put some stability force with your hips and legs , to stabilize more your wood bench .
A very low secondary surface( mostly for tool keeping ) will harden your job .
Keep woodworking and be happy while doing it .