
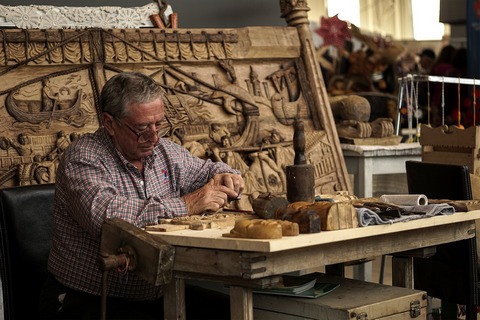
The woodworking activity isn’t only the creation of wooden tables , chairs , boxes and many more wood furniture for our houses . A large part of the woodworking activity is the carving activity and it’s the most difficult and demanding ( physical and mental) , in my opinion.
Carving is the display of images , above a wooden surface using the appropriate technics and carving tools . Carving is a part of the sculpture activity – art , but in here we don’t carve images on stone , marble , granite , et.c , we carve above a wooden surface of different types of wood .
Of course if a carpenter wants to step in to this artistic wood activity , he should be prepared to “sweat” a lot and be very patient . The advanced knowlege of wood and its properties would be nice and it would help him , during his learning process .
I’ve written a helpful post for the properties of wood , you can see it in HERE .
The wood carving tools which are basic for carving , aren’t different than the “common” carpentry tools , but in here we have the most “elegant” – artistic – “surgical” in details , versions of them .
Wood carving has to do with sculpturing wood with the highest accuracy possible .
The Basic Wood Carving Tools are :
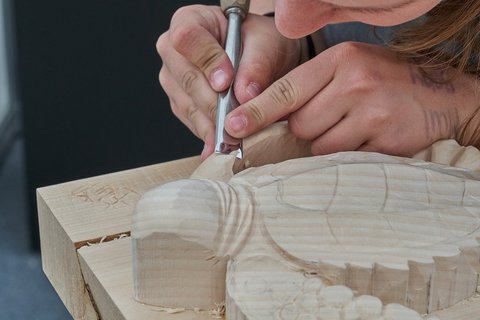
1) The Wood Carving Gouges .

These are the “common” chisels we know in carpentry , but they have one significant difference . The chisel “body” is curved in order to carve curves , but also their wide blade we use to shape wood , is curved too .
The carving gouges , are column and basic carving tools and we use them to create our kitchen equipment(spoons , bowls , et.c ) and “dig” wood in general . Their steel quality should be the best possible , to sharpen well .
The feeling they should give to your hand is another significant feature of the gouges . Remember you’ll create wood detail with them . Nice comfort and feeling are major tool advantages .
Looking a gouge you’ll see two numbers like : ” 5/16″ . The first number is showing you the curvature of the gouge and the second , its width in (mm) .
We have many types of gouges , concerning their curvature . We have half – curved , half – curved and deep , V shape type , et.c .
Mostly we use our gouges , pushing them with our finger – hands and less , by using mallets .
2) The wooden carving Mallet .
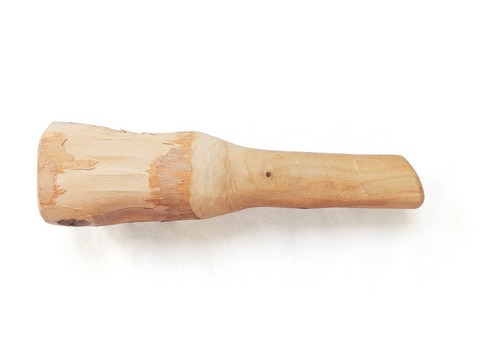
Mallet is a non iron – metal hammer and we use it to hit our wood in order to make adjustments , joints ,et.c . Its hitting part is made from soft materials ( wood , silocone , et.c ) .
The carver needs a small wooden mallet to use and in my opinion a round small mallet .
Why the Round small mallet is Best for wood detailed carving ?
The round mallet gives almost the same hitting surface , in all times even if you aren’t hitting your gouges with the exact center of your mallet .
If you use a joinery mallet ( or any other shape ) and your hand “slips” a little during the hittings , you’ll hit the gouge(chisel) with the mallet’s edge .
This , will make your mallet to tremble , lose its balance and this will “break” the continuity of your hittings .
Hitting with a round small mallet , you have almost the same mallet area to hit and this is very importand when you carving hit continuously , “seaking” for detail .
3) The Wood Carving Knife .
When you want to make very tiny wood decorative “diggings” , wood swirlings and detailed wood actions like these , a wood carving knife will make your life easier .
See my top suggestions for your marking striking knives , in HERE .
4) A very comfortable Workbench .

Above your workbench you’ll spend many hours of carving and you should be very comfortable while using it . Yes , you may use your all around woodworking bench , but your bench should have some significant features .
See my top workbench suggestions & some accessories in HERE .
If you’re a Beginner , how do to Start to carve ?
As all the crafts , carving cannot be learned only by books and theoretical . The “old days” the student who wanted to become a carver , he was going to a more experienced – professional one and he started , doing “auxiliary” jobs .
According to his learning capacity , he evoluted and passed to more complex carving projects . This process usually has taken over a decade , in order to be a very good – professional wood carver .
Today , we have schools , seminars( online or not ) , colleges and “countless” more ways to learn wood carving and of course the time is way shorter .
I suggest you to combine theory and practice and i’ve written something about the mentality of the learning process , see it in HERE .
What is the most “popular” wood carving technique ?

There are many wood carving technics and some of them are very advanced and hard , but the most common and popular is the inscribed carving technic .
You simply pass you design from paper to your wooden surface , “digging” shallow lines . These designs are mostly very easy ones . Geometrical designs , simple lines , et.c .
Remember in HERE the most popular carving techniques .
What Types of wood we don’t use for wood carving ?
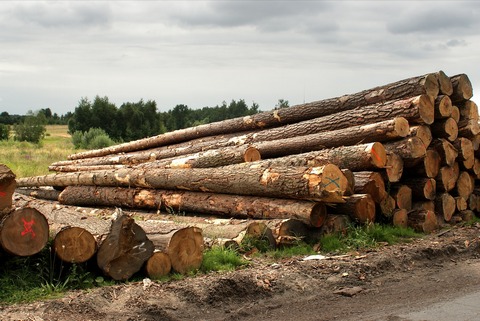
We don’t use resin types of wood( pine , spruce , Libanon cedar , cypress ) and wood which has many knots , no matter if it’s a “hard” type of wood and we can work easily with it . We don’t want knots .
We prefer to use “hard” types of wood , than the “soft” ones and even if the “soft” types , are easier to carve . Many times when a “soft” type of wood is drying , reveals cracks and we don’t want this .
We usually make “light” – shallow surface carving to the “soft” types of wood .
“Hard” types of wood with medium to high density is the best carving solution . Chestnut is maybe the best wood type .
Are there any Wood Carving “Secrets” and Tips ?
1) When you work with your wood carvings , don’t let your body to touch the workbench(it makes your movements difficult) , but don’t either have a great distance from the workbench . You’ll hurt your back .
2) If you carve wood upright , your legs should be stretched and step on the floor with all your foot sole .
3) Your one hand should hold the carve gouge with all the fingers on it and the other hand should push it using the down area of the palm . Depending to what is your “good” hand , make the adjustments .
4) Your hands , your gouge and whatever else , must not affect your eyesight .
Your eyesight should be 100% focused in the entire programmed course of the gouge , from the starting touch point , to the end of the movement . This is very importand .
Many injuries have been caused by “wrong” eyesights and reduce of focusing .
5) Have the best possible psychology to do the wood carving and you should be refreshed , while you carve wood . Not only the sharpening of your tools need good psychology , but the wood carving too .
Everything in life is psychology and the wood carving , isn’t escaping this “rule” .
Keep woodworking .