The most important maintenance job for a woodworker is the correct sharpening of his hand tools and after that , the correct storage for them , in order to be well sharpened for a long time . If your woodworking tools aren’t sharpened correctly , you cannot cut even the “softest” type of wood .
Beside that , a non well and correctly sharpened tool , “hide” dangers for you and it may cause small or bigger injuries .
If you want to remember the info about the “soft” and the “hard” types of wood , go in HERE .

Woodworking tools sharpening , is the process of making our hand tools as our hand planes , chisels and hand saws , correctly and well sharpened to cut and shape wood with safety and effectively . This sharpenimg process is made by the carpenter , with the assistance of manual or power equipment .
The sharpening process is seperated into 3 very important categories . These are :
1) The Correct Grinding .
This first step is important , when your tool’s sharpening edge is “badly hurt” and you need to re-make it from the beginning . It’s a very important process and in here you’ll use your grinding equipment to create the angle you want to the metal , by beveling the metal .
Usually this angle is between the 20 – 25 degrees . Remember that a low angle gives more “surgical” and elite slicing cuts(peeling wood) and a high angle gives more strong cutting force . This applies for all the metal blades and of course for your chisels and hand planes .
Tip n. 1 :
Also remember this : You create your angle by beveling only the one side of the blade . The other side must be as flatten as you can .
Tip n. 2 :
You don’t want in any way your sharpened metal to overheat from the sharpening process . Make small or bigger breaks and you can use also water to lower the overheated metal .
If you overheat the steel , it loses many of its properties and it gets “softer” than it should be . It can also lose its coating , if it has some .
2) The Correct Sharpening – Honing .

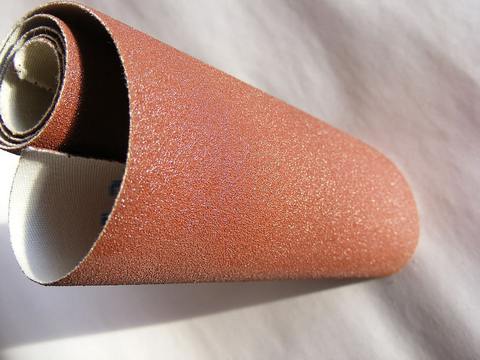
After the successful grinding and the creation of the exact angle you want your blade , it’s time to sharpen it . You make the honing by using mostly grindstones , having water or oil in their surfaces for better sharpening . You can use sandpapers if you like , too .
Our “target” in here is to make the bisection point between the flatten back and the beveled part , be as sharp as a japanese “katana” . This edge should be razor sharp .
3) The “Polishing” of the Edge.
In here it’s important to make the last perfection steps for our metal . We use a leather strip and with elegant moves , we drag our ready sharpened blade above this strip , in order to make it perfect .
Many “old” carpenters used baseline or grease for this job , but in our days you can use polishing cream . This is a special cream for this job and it may has light emery elements inside it .
The benefits of polishing your blade is that you make the sharpening – honing process , to last longer so you won’t have to re-make it , again and again .
Helpful Grinding – Honing , Tip :
While you’re grinding and honing your chisel blade or your plane’s , creating the angle you want , you’ll observe a tiny metalic “hair” , spike at the top of edge . This spike needs to be removed .
Do that , by turning your blade on its back and being totally parallel to your grindstone , make a couple and light reciprocating moves . This is enough to remove these tiny metal “spikes” from grinding metal .
Can You sharpen your tools all Alone , even if you’re an amateur carpenter ?
Yes , you definetely can and this includes a very significant benefit for your evolution as a carpenter . As you begin the sharpening process and you continue making adjustments correcting your sharpening movements , you’ll gain a very personal “relationship” with your woodworking tools .
The sharpening process will make you a better tool operator , will give you precious experience and eventually you’ll become a better carpenter .
Is it better to sharpen my tools Manually or by using Power equipment ?
The better way to sharpen your edge wood tools , is the correct and “wise” combination of your manual equipment , as your power one equally .
You should be “comfort” using both these two ways of sharpening equally , because they are complementary . The one “helps” the other and both they can give you perfect sharpening results .
On the other hand , one day you may miss one of these sharpening ways for any reason . You should be able to sharpen your tools , using the other .
What sharpening Machinery , do i need to sharpen my tools like a professional ?
The power machinery that exists in here , is very helpful to a carpenter and it makes his life , way easier . Here is the list of the basic sharpening machinery :
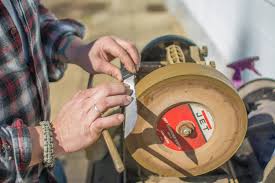
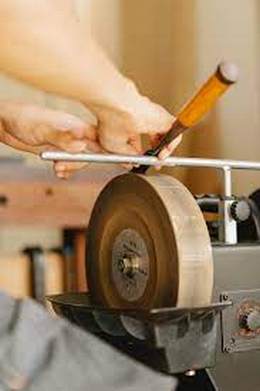
1) The Bench Grinder – Wheel .

It’s the basic tool you’ll need to create your blade’s metal angle , by beveling it in your bench wheel . Prefere to operate your wheel in low speed in order not to overheat the steel of the sharpening blade . Go slowly – slowly , make continuous breaks and use water or an oil , to cool your blade .
There is a big variety for the materials of the wheel and you can choose whatever you like , as you can find vintage bench grinders , moving manually from you by a crank .
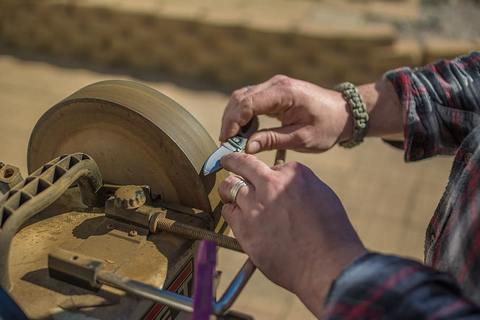
2) Water grinding Wheels – Grinders .
In here a grinding wheel part , is inside the water so your blade’s steel won’t overheat during the grinding process . These grinding wheels are very easy to use and they don’t have any difference than the “classical” bench grinders .
3) Gringing and sharpening with Sandpapers only .
I suppose this method is the cheapest( if you don’t destroy many sandpapers of course ) , but it isn’t a bad one if you want to start with it . You just put your sandpaper on a flat and stable surface and you start the grinding and the honing of your blade , making back and forth movements of your blade .
In here i won’t suggest you to grind or sharpen in a melamine surface , because it’s very slippery and you may get hurt .
4) Sharpening Stones .
In here you’ll find :
a) Water Sharpening stones .
b) Oil Sharpening stones .
c) Diamond Sharpening stones .
The water sharpening stones is a mixture of elements in order to sharpen your blade and most of the times , they contain a percentage of emery .
Except the big water stones , in here we have the water slip stones , which are smaller stones used for more “surgical” and elegant honing , the big ones cannot do .
The Oil stones are natural stones and they give a little less sharpness to your blade’s edge , but they’re very capable , too .
The Diamond stones is the latest evolution of sharpening stones . They last longer than the water and oil ones , but i think that they aren’t so effective as the water and oil ones . They need less water to their surface , but after the sharpening they need to dry them and protect them from rust .
As you may imagine , you use your stones( water & oil ) after you’ve water them and then you proceed to your sharpening .
5) Have a polishing Leather Strip .
As i’ve said earlier the last ( but not least ) step of your grinding – sharpening is made by using a leather strip . You make your sharpening job , perfect by a back and forth motion above a leather strip using a polishing cream .
It isn’t hard to make it by your own . You just cut a leather strip , you glue it above a surface ( without wrinkles ) and you’re ready .
6) Have a Honing very helpful guide .
If you want , to sharpen your chisels and hand plane blades , very easily and i the exact angle you like , the honing guide is a must . This guide , holds the blade exaclty in the degrees you want , so you can create the angle you like .
You can do the job , with your “eyes closed” .
7) Have a diamond plate to Flatten your Stones .
Durng time and with the sharpening use , your stones , will need to be re-flattened for sure . This is a job of a diamond lapping plate and it makes the flattening job , very easily and fast .
8) Hand Saw sharpening .

see how to shapren handsaws more extended( full guide) in HERE .
This area needs a little more experience , but for sure you can start and gain experience by following the exact sharpening steps :
a) Make the hand daw’s “teeth” having Equal height .
In here you use a file to do the “mission” . The continuous use of your hand saw , damages its teeth and from time to time they need to be re-adjusted to the same height . It’s a very important maintenance action from you .
b) Correct and re – adjust its “teeth” angles .
After the correction of the teeth’s height you need to correct the angles of them . You use the triangle file for the job . Remember that the rip and the crosscut hand saws , need different angles .
c) Create a wide hand saw Orbit .
In here you use a tool to push the teeth in the direction you want , to create a wider “saw orbit” and have better cutting ability . This wider cutting orbit , prevents your saw from sticking while you’re cutting wood and makes your effort easier .
This tool is called “Saw Set ” and looks like the rivets tools .
d) Refine your hand saw’s sharpening .
This is the final stage of your hand saw’s sharpening . Your sharpening actions create grits to the saw’s teeth and you should smoothen – “clean” them , using a diamond plate .
Proceed very slowly and it’s an easy job . Just pass the diamond stone , along to the teeth till the plate slides easily .
If you wan to see more for the so important carpentry tool as the hand saw is , go in HERE .
How much Time the tools sharpening , need ?
In here there isn’t a solid answer , because the time you’ll need for sharpening depends from many factors , as your experience , your sharpening tools , the environment conditions and of course your mood .
The metal blades and their “behavior” to every treatment( and sharpening of course) , depend on the general environmental conditions , as moisture , extreme heat , cold , et.c .
As for the appropriate mood and psychology you should have during the sharpening , it’s important too , also . There will be days in which you’ll do the sharpening in minutes and other days you won’t even get close to a nice result .
If you want to read more for this “magical” woodworking factor , read in HERE .
How can I identify , if a woodworking tool is sharpened Well ?
A woodwokring tools is sharpened well if not only can “shave your arm’s hair” and slice wood “like butter” , but how smooth and accurate , it does all that .
You need your well sharpened chisel – hand plane – hand saw , to “follow your cutting orders” , in a micrometric scale and be smooth at the same time .
Never stop woodworking .