
The woodworking tools list , is a very important factor in our woodworking “planet” and i’ll try to cover all the basic and necessary tools you should have in your warehouse or carpender’s box .
You need something to shape your wood to become the plan you have in your dreams , so to have some woodworking tools is necessary .
The woodworking tools for the amateur – more experienced , or the professional woodworker , are separeted into 3 column categories .
We have 3 Big Woodworking Tools Categories .
The most common situation is having a combination of these 3 major categories . These categories are :
1) Hand , Woodworking Tools .
2) Power Woodworking Tools .
3) Professional Carpentry – Machine Tools .
Don’t you forget the differences between , the several metric standarts of your continent . In Europe we measure with cm , in the US with inches , et.c .
Of course the measuring woodworking tools know these differences , that’s why you see all the different types above them . They are universal made .
Woodworking tools , list :
Here is the list , you should have from the level of the tree to a finished woodworking project , for an amateur or a professional woodworker :
1) Buy or make a Woodworking Bench .
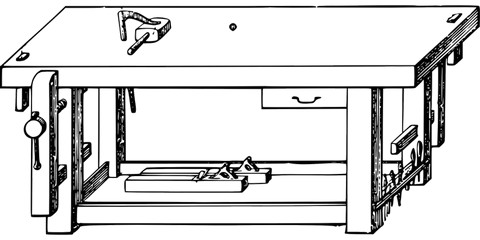
It’s maybe the most significant carpentry equipment for you . It should be very stable , in order to make your wood jobs . There are many bench attached vices ( leg vice – shoulder – tail – wagon – end ) and they are all be very well attached to the bench .
The bench’s working main vice , in which you stabilize your wood piece and you drill it , plan it , et.c , is the basic “column” of all .
The bench’s height , as i’ve told you many times should be in the height of your belly button , in order not to bent your back .
Its length and widerness should be at around 20”wide and at around to 6 – 8 feet long . It’s up to you .
Be careful that its “legs” to be in the same height(not higher) to the upper surface , so the “legs” won’t be a problem when you put a wood part on it .
Mostly woodworking benches are made from yew wood .
See my top workbench suggestions for you to purchase in HERE .
2) Buy a Vice , to attach to your woodworking bench .
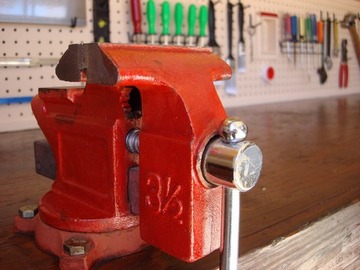
Except the vices your bench would have on , you should buy and attach a classical metalic vice( a good steel one ) , in one of its edges .
It’s a very helpful assistant , in order to use a file , a rasp , to cut something , to stabilize materials in general .
See my top vice suggestions for you , in HERE .
3) Buy – Have a Storage System for your tools ( + a toolbox ).
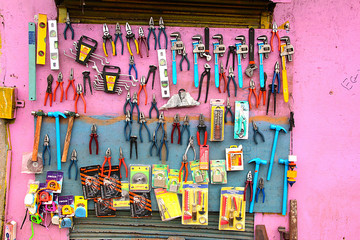
A storage system to have your wood tools and equipment organized is a another basic part for you , no matter if you are an amateur woodworker or not .
A well organized place , will keep you calm to act carpentry and the most important : you won’t lose tools and you’ll always know where you put them .
A toolbox in order to be more flexible and portable is needed .
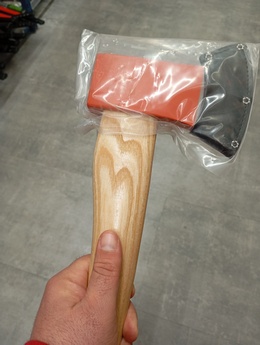
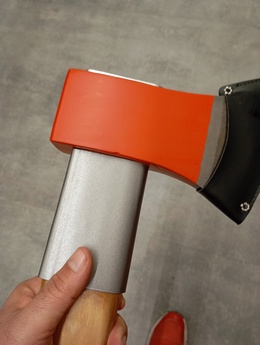
4) Axes – Cleavers – electric Chainsaws .

When you want to cut a tree , shape it and transfer it to your warehouse , you cannot do that without some axes , a electrical chainsaw and some cleavers .
Be careful concerning your safety measures and never underestimate the “bad moment” . These tools can make huge damage to a human’s body .
5) A Moisture meter .
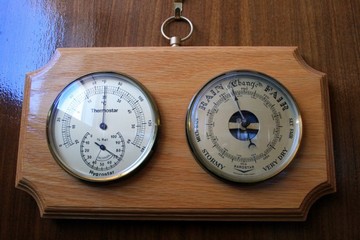
A moisture meter is a very helpful assistant for many jobs . Wood changes shape , while is drying and we need to know how dry is our wood , to work with it , to paint it , to polish it , et.c .
6) A metal detector .
When you’ll start to cut an unknown wood part this is may be dangerous for you , but there is a way a metal detector will be a great helper , for you .
I’ve written an article explaining this , read it in HERE .
7) The folding rule , made from wood .
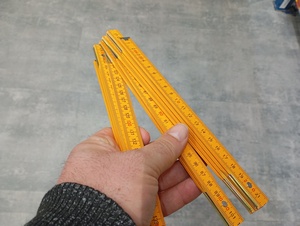
In its two sides you’ll see that inches – feet or cm . It’s the most popular carpender’s meter and it’s very useful . Because of its stability , you can measure straight wooden surfaces . It’s biggest property is its stability and it fits in your pockets , very well .
See more of my top ruler suggestions in HERE .
8) The classic flexible meter , made from more flexible materials .
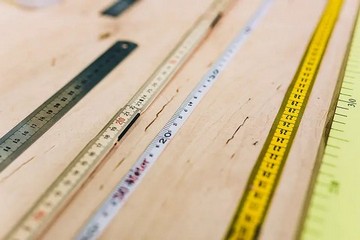
You can find smaller meters in the markets with specific dimensions , made from steel , aluminum , flexible plastic .
It’s more portable and you can use it for wood plans in which you don’t need a more flexible meter , to measure arcs, curves , et.c .
9) The retractable Tape type meter .
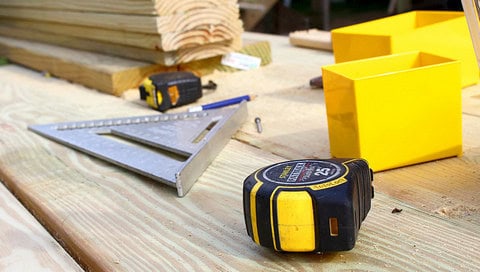
The bigger benefit from this is that you can measure curves , circles , et.c , in big lengths and distances at the same time .
You cannot only measure very long distances ( more than the folding – flexible meters ) , but you can measure curved surfaces .
If you are very careful and you have someone to help you , you can measure curved surfaces with very good accuracy .
They are made from aluminum mostly and they need zero maintenance . Just don’t hit it with something heavy , or droped it from a very highly spot . They are very conviently , light , small and easy to carry by anyone .
10) Metal rulers .

It’s very convenient to have some , metal rullers .
You can have a small 6” one and a couple of bigger ones at around 10” to 18” . They’ll give you fast measuring , they are light and you can carry them easily .
11) The Level tool .
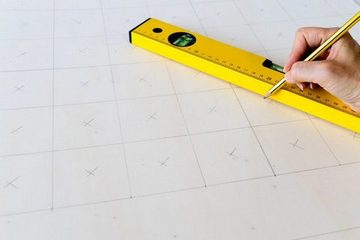
Verticality is a very serious matter for all the woodworkers and should be for you also . Who wants a wooden table , library , desk , chair or whatever you may want to create , being awry ?
I think noone . To avoid these kind of embarrasing situations , the level tool should be inside your carpender’s box , no matter what .
*** Tip to check the verticality if you don’t have a level tool with you .
If for any reason you don’t have a level tool with you and you need to check the verticality of you lines , use gravity . Tie a big screw or a pin with a rope and let it free to the ground . This line is totally vertical driven by gravity . Check the if your lines are parallel to it and your work is done .
12)The Caliper – digital caliper .
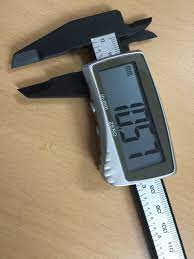
Many times and especially when you want to connect your wooden surfaces , you’ll need to measure the thickness of these surfaces . You’ll need the best possible accuracy and you’ll need to know how “fat” is your wood . For this you should us the caliper tools .
In the markets you’ll find nowdays caliper tools and digital calipers in very low prices . The digital calipers will give you more accuracy .
See some of my top caliper suggestions for you , in HERE .
13) The carpenter’s Pencil .
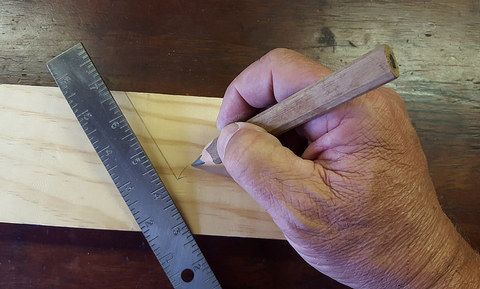
Yes , the so “common” carpender’s pencil is a must for you and it’s preferable to have a good quality’s pencil .
See some of the top pencils & lead holders in HERE .
You’ll be able to sharpen it more easily and the marks it’ll make will be very accurate .
The wooden pencils are made mostly from Red Cedar , which you can find in Kenya and the US of course . In California’s Sierra Nevada Mountains .
You can find a very high quality’s cedar wood and if you ever had a woodoworker’s pencil from this kind of wood , you know what i mean .
Your wood pencil and your accurate maths , to measure , cut and connect your woodwoking projects , are the “lighthouses” of your plans . So never underestimate , these small “details” and if you want to see why the carpenter’s pencil is flat and not round , see it in HERE .
14) A Marking knife .

When you’ll make joints you’ll need to be very accurate . In here the marking knife , combined with other measuring tools , can do the job and be certain that it’s a sharp one .
See some very nice marking & striking knife suggestions , in HERE .
15) Awls .
The awl , if it has a sharpen edge can mark wood very accurate and do your “job” , very easily .
16) Dividers (compasses) .
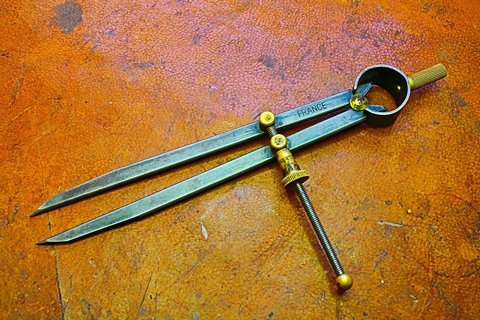
The dividers are used for taking accurate measures , transfer these measures and they are very useful when you make your moulding measures , to “describe” an arc .
If you want the best of accuracy have the ones which are adjusted with the screw .
See some of my favorite dividers , in HERE .
17) Protractor .
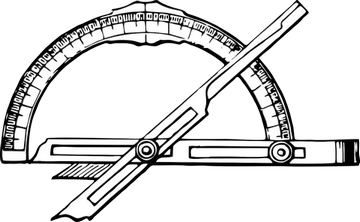
Protractor is a very useful tool , in which you can take very accurate angle measures for your edge wood tools . It’s made from aluminum .
See some very nive protractors – dovetail markers , et.c , in HERE .
18) Dovetail marker .
Dovetail needs great accuracy and the dovetail marker , will help you to this . Of course you can do it manually with your tools , but it’s nice to have a marker this kind .
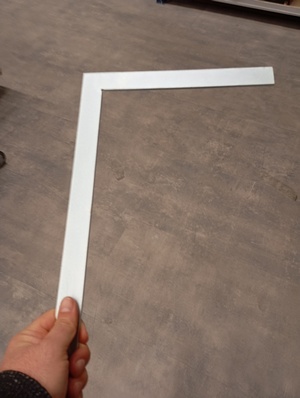
19) Create/Have a Straight edge .
When you want to measure the flatness of your wooden board in the edges and in front , it’s very helpful to have – make a straight edge tool .
You can make them by yourself from wood , but they can be found in metal too . Have some straight edges and they have usually 1m length .
They are in the big rulers “family” .
20) Make & have a Winding stick .
Another testing board woodworking tools is the winding tool . You use it when you want to identify if your board is twisted . They are like the straight edges .
See some top straightedge & winding stick suggestions in HERE .
21) Make on your own a Diagonal testing stick .
When you’re about to finish and glue your wood plan you need to check its squareness . This stick is put diagonal to your frame , – box and does the job .
22) Double squares .
The double squares are like the below combination ones , but without the comfort of marking 45′ degrees using their ball bearing surface .
See All the types of squares in my suggestions for buying in HERE .
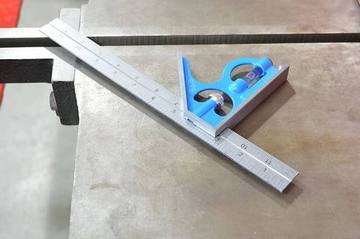
23) Combination squares .
They more flexible than the classic squares . They have a movable bar , which you can slide and mark several lengths on wood . You can also mark 450&900 degrees angles using their ball bearing surface .
24) Buy or create Try squares .
You can have “vintage” ones from metal or wood . Of course you may need to check their squareness , because they are kind of “old” ones .
How to do that ?
Put your square in the edge of a board and draw a line , using the inside . Then flip over it and try to mark on the same line . If you can , the square , is ok .
Of course you can make your own squares .
25) Framing square .
Framing squares , are big squares . They are longer and you can measure the squareness in bigger boards , frames , et.c .
They aren’t so accurate as the try squares are , because the dimensions are bigger , but they should have accurate squareness . They’re used in the lumber work much and in bigger wood constructions .
26) Sliding T-Bevel squares .
They are the best for tranfer and keep stable an angle when you make joints ( dovetail ,et.c) . They are very helpful and try to avoid the brass made . You may find it diffcult to stabilize it , cause of the brass material .
27) Marking gauges .
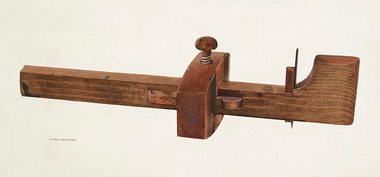
When you want to mark reference lines for your joints , you use gauges . They mark wood using a pin most of the times , but there are more types of gauges , using sharp wheels for marking et. c .
See All the range of marking gauges in my top suggestions , HERE .
28) Mortise Gauge .
The difference with the marking gauges is that they have two pins to mark wood , instead of one .
29) Create or buy a Panel gauge .
It’s a gauge that it’s way bigger than the traditional ones and you can mark wood boards in big distances .
30) Feeler gauge .

The feeler point is combined with the straight edges . You put it between the straight edge and the wooden surface and you check the gap .
Some of the best feeler gauges in HERE .
31) Buy a nail set for your pins .
When you want to put more deeper in your wooden surface your pins you need a helper and a nail set is useful . You just hit a little more the “head” of your pin and the job is done .
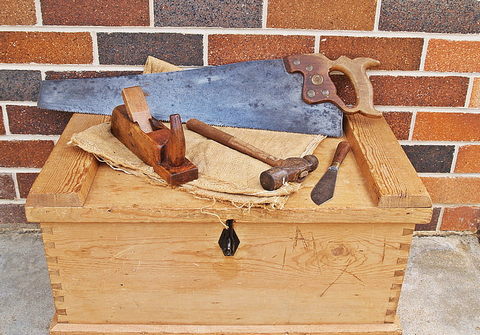
32) Panel hand saws . ( most common handsaw .)

Unavoidable the “king” of the woodworking tools are the handsaws . There are so many , so different and we use them to cut our wood logs , branches , et.c .
They are made by a steel surface/blade , which has the “teeth” of the saw and it’s attatched to a handle .
The handle of the saw can be from wood , plastic , several synthetic plastic pieces , et.c . The saws have several sizes depending the job you want to do with them .
You can see saws , which can cut very large tropical tree trunks and you can see little ones which they cut extremely accurate .
See some of my best panel saws – back saws & frame saw suggestions in HERE .
33) Back saws .
They are made for more precise cuts , so as you can imagine they have large TPI ( teeth per inch ) , in order to be precise . Their backs are metalic , so the saw won’t bent from cuttings .
34) Frame Saws .
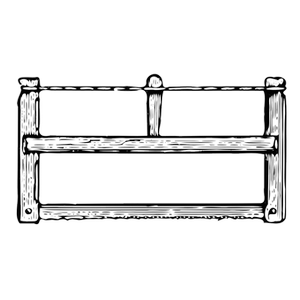
When you need tough and large cuttings of a log , a big board , or a tree’s trunk you use the frame saws .
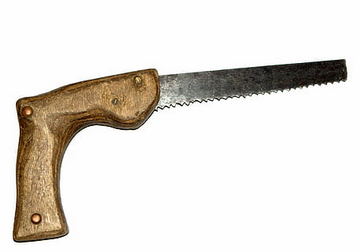
35) Keyhole hand saws .
This saw makes entire holes in your wood and can shape wood inside a pre-cut hole in a wooden surface .
36) Dovetail saw .
These saws are made from accurate joinery cutts . They have a metalic back in order to be very stable and they are the smallest bakc saws . They cut along with the wood’s fibers and this joint “mission” is very significant .
37) Crosscut /Carcass Saw .
This is a back saw which cuts wood across with its grain . It’s a joinery saw and it’s a very necessary one . It has small teeth and it cuts , very precise .
38) Ripping hand saws .
This saws are made ot cut along with the wood’s fibers . It is the bigger back saw and it’s a another basic hand saw you should have .
39) Combination of ripping-crosscut hand saws .
Of course you can have combination saw to rip and crosscut with the same ability .
40) Coping saw .
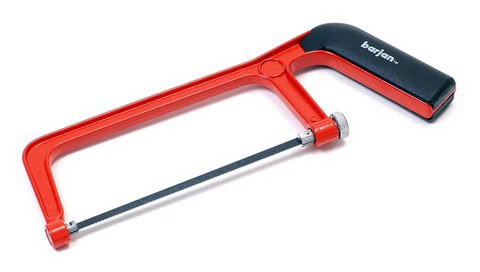
The coping saw is something you’ll remember for sure from your school years . It’s a tiny cutting blade between a metalic frame , we used to make our amateur wood carvings .
It’s for small and precise jobs – joineny and shape inside(or not) the wood’s surface with accuracy .
41) Bow Saw .
It’s like the coping saw , but larger . They have the same cutting philoshophy , but this can cut bigger pieces .
42) Miter Box .
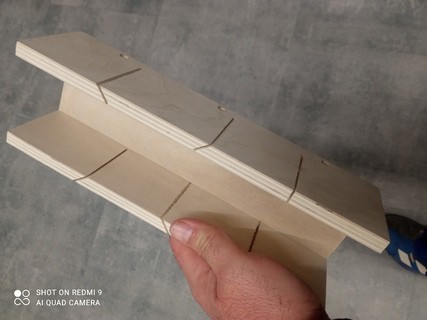
The miter box is a metalic(many times) – wooden – plastic frame , that can hold inside it a back saw , so you can make very accurate cutts . It’s very useful and it’ll help you the most to be “surgical” .
See some best miter box suggestion in HERE .

*** The Japanese style hand saw for extremely precise cuts should not be missing from any warehouse .
It make very detailed and accurate cuts .

Some Tips for the hand saw’s “teeth” :
a) If your saw’s “teeth” lean backwards to the handle of the saw , the saw cuts when you drag it to your body . If the saw’s “teeth” lean forward , the “teeth” are cutting when you push your saw .
b) The bigger the hand saw , the bigger their teeth and with large inclination .
c) The smaller saws are made for the best possible accuracy and that’s why you’ll see that they have more Teeth Per Inch (TPI) . In the labels of your saw you’ll see among others , a number for the TPI .
It’s how many “teeth” they have per inch . The more “teeth” , the more accurate it cuts .
d) Before you start your cutting with your saw and if the wooden piece is a “hard” wood , if you lubricate the blade of the saw , you’ll see how easily you’ll cut your piece . If you stuck during the cutting proccess , use lubrication again .
e) If you want to cut more easily and don’t put much power ot your saw , try to have the saw , your shoulder and your hand in the same straight line .
f) Use the appropriate hand saw for the specific work you want to do . Don’t “mix” the hand saws , because “it’s ok to cut a little thing here and then i’ll go and take the correct saw” . You’ll damage the “teeth” .
g) Start your cutting very lightly and then escalate your power . You don’t want to cut awry by using extreme power at the beginning . If you want more accuracy , mark with your pencil the starting of the cut and the end of it , so your eye be focused straight .
Hammers exist in several weights and from several materials . Here is a very serious “law” , and all carpenters follow it . You never hit wood with a metalic hammer .
You’ll damage the surface of the wood and this is irreversible . If you want to hit your wood to make your adjustments , you should always use the carpenter’s mallet and soft ( from silicone , rubber ,et.c ) ones .
43) The carver’s wood Mallet .
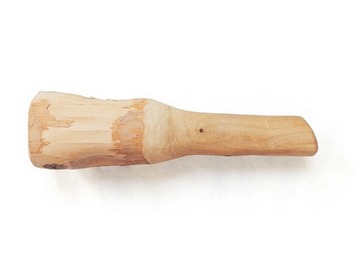
It’s a more “elegant” mallet then the classic mallets . The carpenters use it to hit their chisels , it’s mostly a round or “roundish” mallets . They aren’t too heavy , in order to hit “surgical” your chisel .
Of course you can make on your own or buy one .
44) Rubber Mallets .
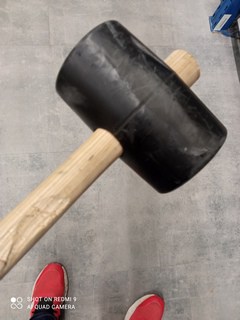
Of course you’ll need some rubber, silikone mallets to make your adjustment hits . Try to have some and not the cheapest ones , because you’ll need enough “softness” during your hits .
The more cheap ones , are kind of stiff and hard . Another benefit of a good quality rubber mallet , is that the material won’t leave marks/spots in your wood .
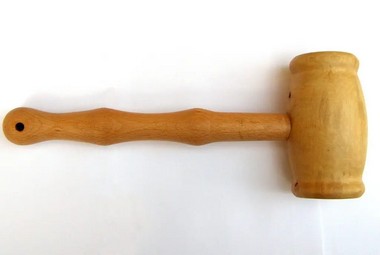
45) Joinery mallet & some big and bigger ones of several types .

The classical joinery mallet ( the “English type” ) is a must for your mallets supplies . They are made from oak mostly and you hit chisels with them .
They are very beautiful also .
46) Have a small metalic hammer , for “surgical” hits .
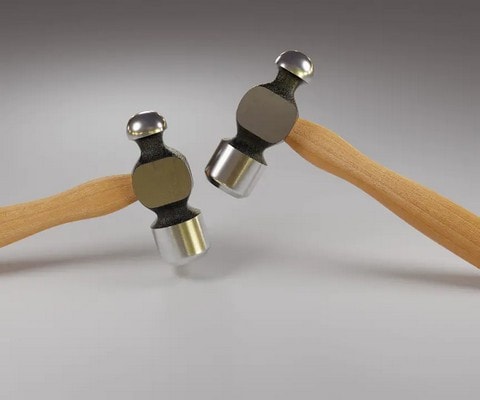
A small hammer for your small and detailed hits , is necessary . You’ll need to make tiny-small adjustments in general , adjust your chisel’s blades , et.c .
Have one or many , they aren’t expensive .
47) Claw hammer .
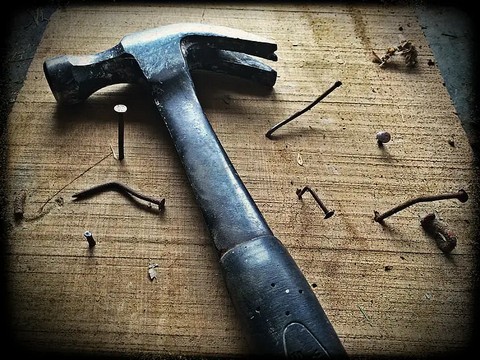
Even if its hitting side isn’t totally flat for hitting your nails , it’s the most classical hammer and exists in all warehouses and carpentry places .
It’s a heavy-duty hammers for all your hits , it needs attention when you pegging your pins and of course you can put out a pin from a wooden surface , very easily without hurting the wood .
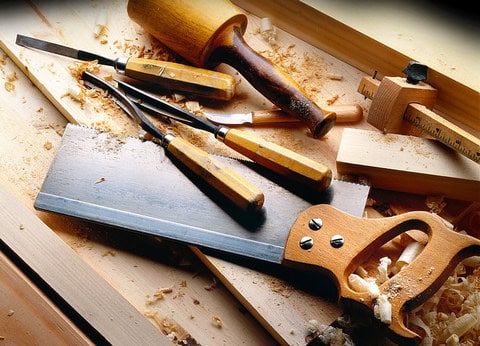
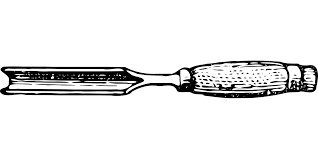
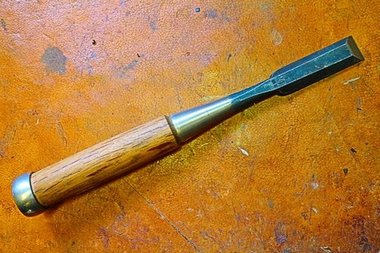
48) Bench chisels .
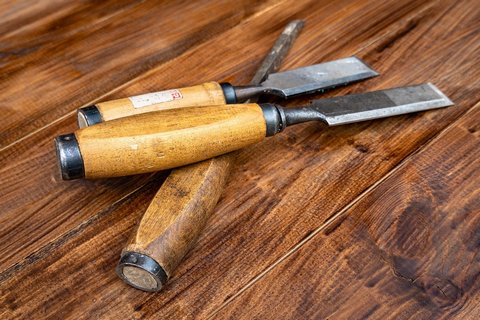
They are the most common chisels , everybody has seen . You can do many sculptures-shapes with them . We mainly make our wood joints with them , but not only that . Of course they are made from good’s quality steel .
See my top chisel suggestions for you , in HERE .
49) Mortise chisels .
These ones are used to make mortises , to wood . Their cutting ability is big .
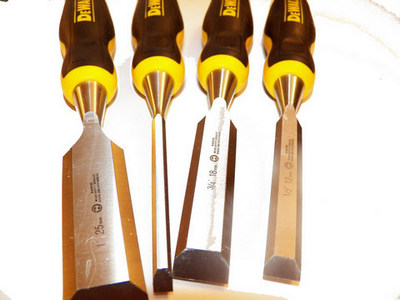
50) Paring Chisels .
These are the chisels you can use for your delicate wood slicing . They’re more elegent created and you can use them to make small-tiny , “surgical” wood slices .
In here their steel should be a very nice quality’s one , in order to be sharpened more accurate .
51) Corner chisels .
Their blade is cornered-angled and we use them to square mortises .
52) Dovetail chisels .
We use them mostly to make the mortise and tenon joint , but there are capable to other chisel jobs .
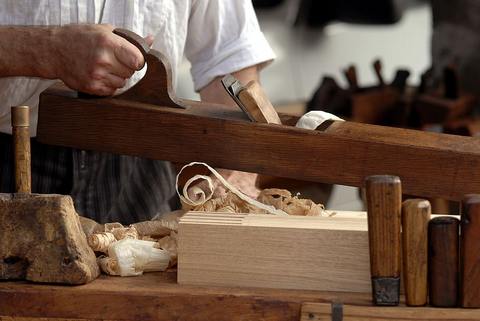
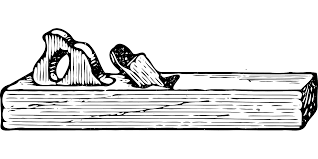
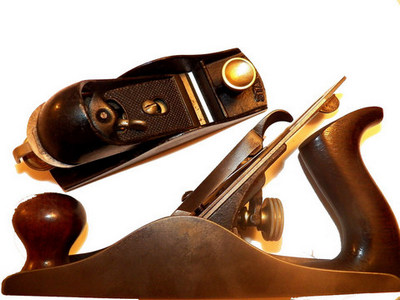
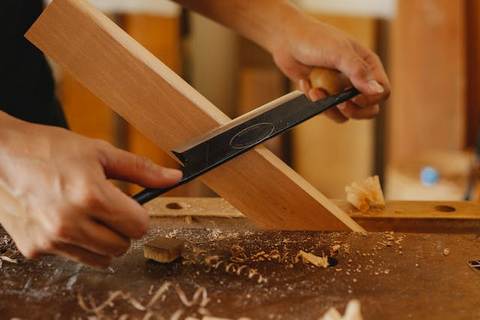
53) Classical bench planes .
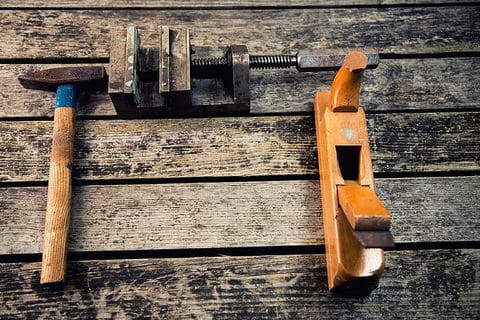
The wooden planes/planers are used to flatten/”eat” our wooden surfaces and make them smooth to the hand’s touch . They are “ancient” woodworking tools and the old days were made mostly from “hard” wood , the majority of the times , it was yew wood .
The sharpening and the correct adjustment of the cutting blade which is underneath the plane , are the “secrets” to make our life easy .
You work above your bench with them , flattening , smoothing , shaping wood .
Jack , block , smoothing , try planes , low angle , et.c exist .
I’ve picked some best plane choices to buy , in HERE .
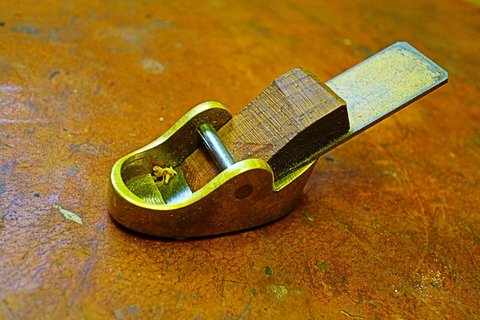
54) Buy Joinery planes .
You use these planes to create or finish your joins .
There are many types of them ( router , shoulder , et.c )
55) Have some molding planes .
If you want to cut a design decorative cut in you wooden board , you use these planes .
56) Have some Combination planes .
We use them for many planing jobs and there are very capable woodworking missions .
57) Hand Brace & bits.
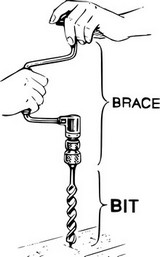
It’s the traditional way to make your wooden holes , manually . You can find and buy antique hand braces , but not only .
They’re combined with drills of course in several diameters and they moved by a rachet .
See a more extended & helpful post for brace , bits hand drills & more info , in HERE .
58) Bits to make your holes .

Of course you’ll need to purchase many drils , depending your holes you want to create . Have as many as you can and don’t forget a file to sharpen them , when it’s needed .
59) The Egg beater style manual hand drill .

This wood tools is so beautiful and you use it to make very precise holes . Its gear moved mechanism is designed wisely for perfect drilling .
60) Have as many drill bits , as you can .
For both your hand brace and your egg beater drill , try to have as many , as you can and always specified for wood drilling , not other material .
61) T-handle hand auger drill .

It’s a heavy-duty drill and you see it drilling large holes in all the types of wood . Ok , it’s maybe not so precise , but it can drill anything . Logs , tree trunks , tough boards , et.c .
If you deside to make a woodworking bench you’ll need one of this .
See some top T – handle augers to supply , in HERE .
62) The Bandsaw .
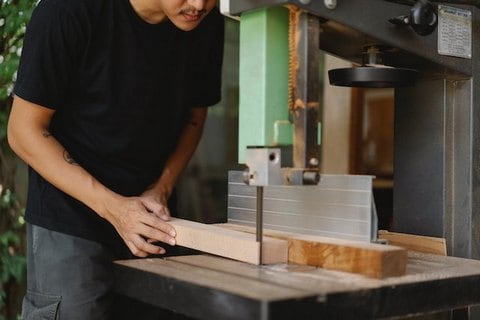
It’s a blade which is rolling between two pulleys and cuts wood . It’s for tough ripping , it combines many cuttings and it can cut curves , difficult or not .
It’s depth capacity ( how far the blade is exposed between the pulleys) are to 4 – 10 inches . It makes the job of the ripping hand saws , but with less sweat .
See and purchase my favorite bandsaw choices , in HERE .
63) Buy a Table Saw .

In here the blade comes from below/inside the table and you can adjust the depth and the angles . You’ll use it to make your wood’s – boards squares .
You can have a cabinet one , in which the motor is enclosed in a lower cabinet and it’s belt driven with pulleys . You also can have a benchtop table saw for lighter duty , but portable .
It’s the favorite wood tool in the constructions area .
Be careful for its safety , its power , its ripping and crosscutting ability and the general quality of the cutting .
Some of the best table saw buying choices , in HERE .
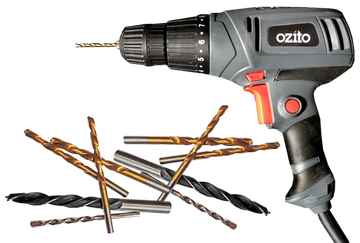
64) Buy a Circular Saw .

We have the ripping saws( cuts along with wood’s grain ) , we have the crosscut ( cuts across the grain ) and we have the combination of these two .
It’s usually 7-10 inches .
See some of my favorite circular saw for you to buy , in HERE .
65) Buy a Power Miter Saw .
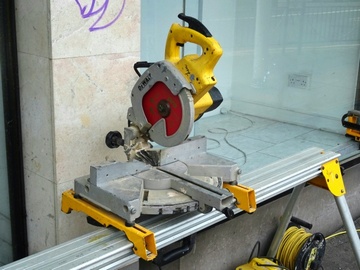
It’s like a circular saw but attached to an “arm” .
It has a 10 inches diameter and makes very accurate cuts .
See some of the best miter saw buying choices in HERE .
66) Buy a Drill Press .
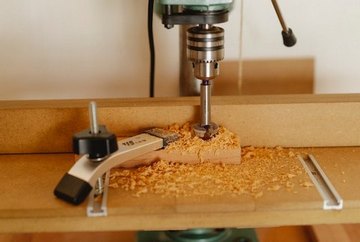
Accuracy and precise drills is something the drill press does . You can have a bench drill press or a portable one ( standing floor alone ) .
Adjustments for its depth and speed are “welcomed” and very useful .
Try to buy good’s quality drill bits for your press . They play significant role .
67) Buy Router & Bits .
We use it , to shape and “dig” whatever shape patterns – artistic holes , et.c we want , in every wood type . It’s super useful power tool .
68) Buy a Power Pointer .
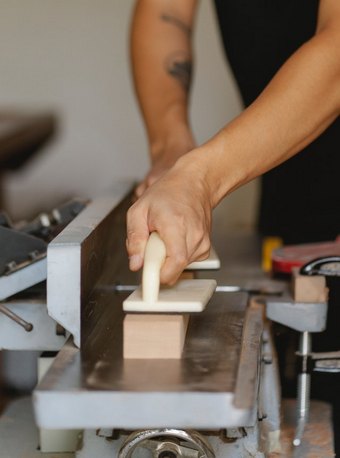
We use it , to flatte the edges and the face of our boards and of course it’s a basic power tool .
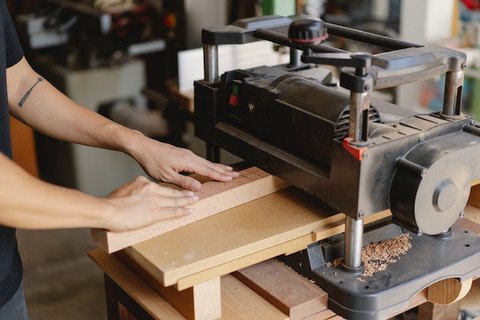
69) Buy a Thickness Planer .

The thickness planer makes your board planed perfectly for its entire mass . It’s very importand for your boards perfection and there are many varieties for them .
Bench top , alone standing , combination with jointer machines , having several thickness capacities and power capabilities .
Some of the best thickness planer choices you can find in the stores , in HERE .
70) Buy a Dust Collector system .
The wood’s dust is so thin , thinner than the road’s dust , the soil’s dust , et.c . When you rub and shape your wood , these tiny dust molecules , are entering your lungs from your breathing .
This is very bad for your health . Except the other safety measures you should take , a top quality’s dust collector is needed .
71) The Jigsaw .

It makes intricate cuts , straight – curved , whatever . It can be used with one hand while the other it holds the wood and makes fast cuts .
We cut veneer with jigsaws and more .
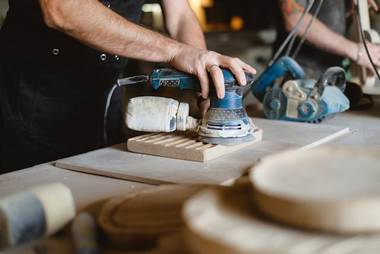
72) Have an Orbital Sander .
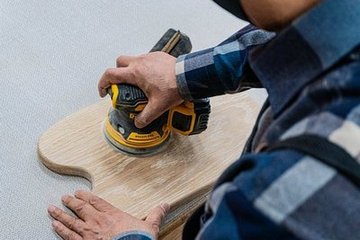
It’s the quick way for your sanding process . The variety they have is endless and of course you can have many types of them .
73) Spokeshaves .
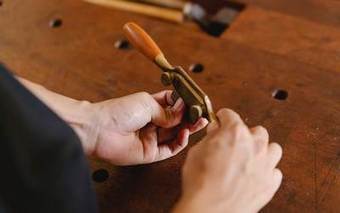
Wherever you need to plane a wood’s curved surface . Yes, they are small handplanes to smoothen aand shape your wood , when it’s curved and you want a big level of precision .
They are several types of spokeshaves , in order to cut a lot or make more elegant wood planing .
If you want some of the best spokeshaves to supply , go in HERE .
74) Raps & Files .
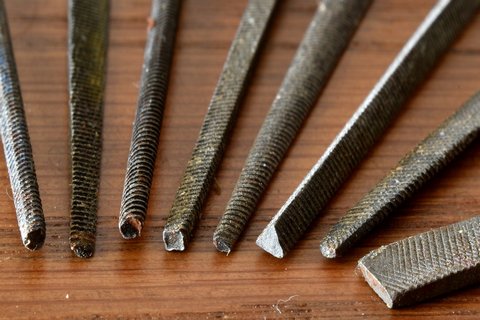
The rasp have coarse teeth and they made ot remove a lot of wood material and the files are for more smoothing adjusting jobs .
I’ve picked some top rasp suggestions for you to buy , in HERE .
There are half-round files , with a flat and a curved side . The mill ones , which are flat in both sides .
The files are used after the rasp work with wood . They smoothen the surface because the rasp are leaving rough marks on wood which need refined .
I’ve chosen some top files for you to get , in HERE .
75) Drawknives .
When you want to shape your freshly cut wood , you use the drawknife . Usually you stabilize the wood in your shaving horse and you slicing wood layers , using your drawknife .
They have many shapes and handles , choose what fits to you .
Many drawknive brands outhere , i’ve picked some of my top to buy , in HERE .
76) Hand screw Clamps .
They are made from wood ( they don’t hurt wood ) and their two wood “jaws” are attached together with big screws on a wooden handle .
They are very useful , while you want to glue two pieces and in general they help a lot . These clampls and a vice can do many holding wood jobs .
77) Parallel Clamps .
Their “jaws” have big opening and they can hold big wood pieces . They put equal pressure to your materials and they are very helpful .
78) F-type Clamps .
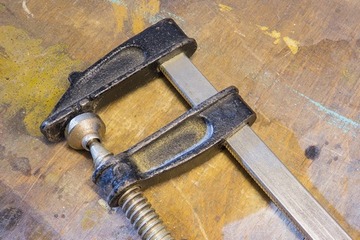
If you want to put more holding pressure to a specific wooden spot , the F-type clamps are the best for the job. They have many sizes and they’re cheap .
79) C-type Clamps .

When you make smaller wood projects and you want much holding power , the C-type clamp is the appropriate clamp for you .
As an amateur or a more experiened woodworker you’ll need some “helpers” in your warehouse and your carpenter’s tools box .
These finishing – sanding , helpers are going to make your wood plans perfect , by fixing and sculpturing the last details .
80) Sharpening tools equipment .

Your tools will need sharpening for sure and the water stones , sandpaper sharpeners , edge grinders , water cooled grinders , sharpening discs , diamond plates and more are the sharpening tools you’ll need to purchase .
See how can you sharpen handsaws all alone , in HERE .
81) Sanpapers .

You use them to make your wood’s surface smooth and polish it , varnish it , finish it , et.c . There are many types of sandpapers( aluminum , ceramic , garnet , et.c ) and with different hardnesses .
Have many of them .
I’ve picked some top sandpapers – abrasives – scraper cards , et.c , to purchase , in HERE .
82) Abrasive pads .

The abrasives are necessary for your woodworking finishing – coating – polishing – smoothing more – removing old varnishes , et.c , jobs .
Their prices are very reasonable and you should have many supplies from them .
83) Wood Fillers .

The wood’s filler , fils the pores of your wood , when you need to . Many times you see gaps in your wood you want to fix , but mostly the filler is used before your final wood finishes , as a pre-layer .
In that way your last layer will have the same thickness and looks . Usually before we paint wood with an oiled based color , we use wood filler to fil the pores of the surface , paint much easier and have a better looks resuilt .
And in many other cases .
See the best wood fillers , wax sticks , grain fillers , in HERE .
84) Wax pencil type , fillers .

The wood pencil filler can fill gaps , holes and in general discontinuities to a wooden surface . Then you can plan your wood , sand it , paint it , et.c .
85) Wood stains & dyes .
We use stains and dyes to color our wood and pop out its fibers and nice “waters” . In here the variety are huge and combined with the finishing oils , we give to wood our personal preferences .
See some top dyes , varnishes , stains , et.c suggestions , in HERE .
86) Wood glue .

It’s always a helpful auxiliary tool for you . It makes your connections more stable and gives a some level of stability to your wood connect combinations .
Have a nice quality’s one and use it in wherever you judge it’s needed . I use some in all of my joints , even when the joint is a very stable one .
87) Dowel Joints – biscuits ( many thicknesses & lengths ) .

It’s the main part of many of your joinery activities . They exist in several sizes , thicknesses . Have many .

88) Buy screw – pins , Screwdrivers .
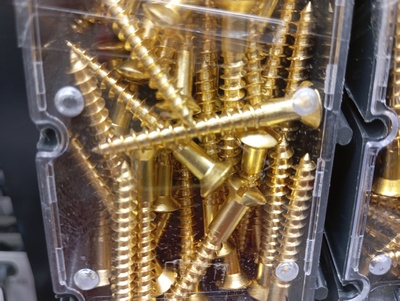
These materials are basic ones and with these you can make your first wood connections , the basic ones . Don’t “underestimate” them . Have many and be careful . Use only the appropriate screws for wood , not other material .
It’s very easy to be confused with the variety of pins in the markets .
89) Screw gun .
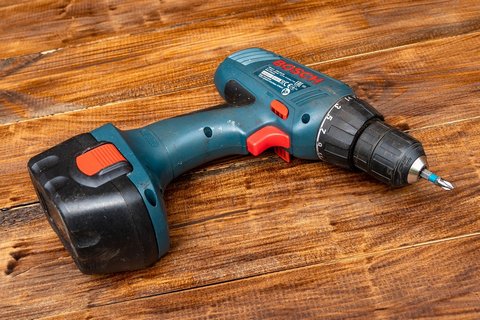
The screw gun willmake your daily life way more easier . You can do so many things with it without sweating .
90) Several finishing/protecting oils ( I like the linseed a lot for inside woodcrafts . )
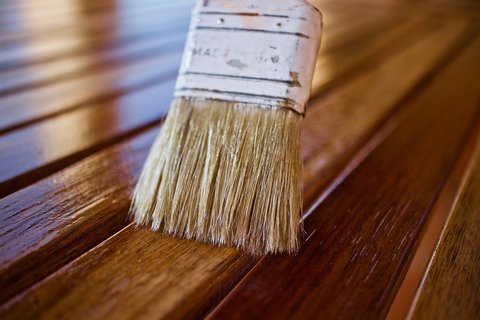
This is a very big woodworking chapter and it has many misunderstandings . What to do for the indoors ? What to do for the outdoors ? What material to use , physical or chemical ?
Just in here , remember this :
For the indoors wooden furniture – projects you can use oils ( linseed , tung , danish , et.c ) wax and their combination .
See some best oils & waxes & shellac to preserve naturally your wood , in HERE .

For the outdoors in the several weather conditions , “things” are more complex and the use of the modern chemical stuff is needed .
If you want the best dyes – stains – paint , et.c , to purchase for your wood protection , go HERE .
Maintenance advices – tips :
Correct and continuous maintenance all your woodworking tools will need from you . One of the biggest “enemy” for your woodworking tools is moisture , water and eventually rust .
So after the hours , you’ll spend with them you must clean them very carefully and slightly lubricate them .
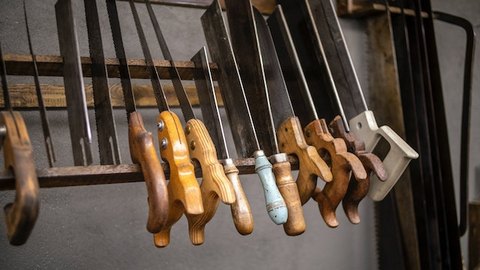
You should never store all your tools together , because they “hurt” one another . If you put your hammers and axes with your hand saws , the certain thing is the the “teeth” of your saws , will get awry and this is bad for them .

Have your saws “hung” in your warehouse’s wall is better . Avoid to use the “wrong” woodworking tool , for a specific “mission” . Every wood project has its appropriate and “correct” tool .
Don’t get bored to go to the other side of your warehouse to get the correct tool . I say that because countless times i do that myself (!) .
Take care the metalic parts of your woodworking tools , and don’t forget the wooden parts of them . The wooden handles of them , maintenance too anda wood’s finishing oil ,would be ideal for them .
Yes i know that all of us the woodworkers the majority of times , we forget the wooden parts of our woodworking tools , because they are kind of small , but this “trap” we must avoid .
It’s very easy to take care of them an try not to neglect them . They are “participate” in the good condition of our tools and if you’ve ever tried to cut a branch with a “handle shaking” hand saw , you know what i mean .
In my opinion the most correct and eco – friendly way to protect the wooden parts of your woodworking tools , is the use of the finishing oils and waxes and not chemical ways .
Remember that you’ll be in very close contact with them , in a variety of difficult conditions ( sweat , heat , et.c ) and your skin’s health shouldn’t be “involved” with chemicals , for long time periods .
I’ve written a helpful post for the 100% natural wood protection , remember it in HERE .
Keep Woodworking and gain tons of happiness.